
Fix Manage Custom Sizes Greyed Out on Mac (Easy Solutions 2026)
Learn why the “Manage Custom Sizes” option is greyed out on Mac when printing and how to fix it — including compatibility, permissions, drivers, and practical workarounds.
Fix Manage Custom Sizes Greyed Out on Mac (Easy Solutions 2025)
Are you trying to create a custom paper size on your Mac but the “Manage Custom Sizes” option won’t let you click it? This is a common issue for users who need specific print dimensions or unique layouts for projects, labels, envelopes, or specialized documents. The good news is — there are several practical ways to fix it. allosguru.com
Below, we explain why this happens and walk you through step-by-step solutions that work for most macOS versions.
What Does “Manage Custom Sizes” Do on a Mac?
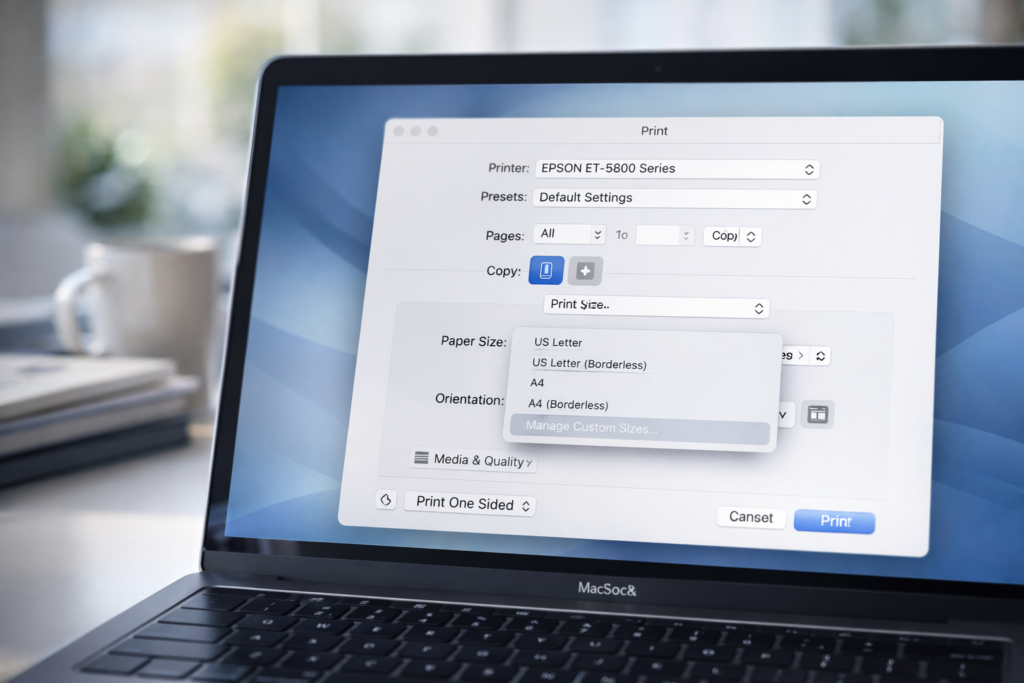
On a Mac, the Manage Custom Sizes function is part of the standard print dialog. It allows users to define custom dimensions when the preset paper sizes (like A4, Letter, Legal) aren’t suitable. Apple Support
This feature is especially helpful if:
- You need a unique paper size for a project
- You’re printing labels, envelopes, or custom prints
- The default sizes don’t match your printer’s output
However, this setting can sometimes be missing or greyed out, making it impossible to add or edit custom paper sizes.
Why “Manage Custom Sizes” Is Greyed Out on Mac
This feature can be unavailable for several reasons:
1. Printer Compatibility Issues
Some printers don’t support custom paper sizes or only work with the built-in presets. If the printer driver doesn’t expose this option, macOS will disable it. allosguru.com
2. Incorrect Permissions
If your user account doesn’t have proper permissions, the print settings can lock out certain features — including custom layouts. This is more likely on shared computers or corporate-managed Macs. allosguru.com
3. Outdated or Incorrect Printer Software
If your Mac or printer drivers are outdated, the system might hide features it thinks are unsupported. Updating macOS and printer software often restores full functionality. allosguru.com
4. App-Specific Limitations
Some applications do not show all printing options. For example, built-in print dialogs in certain programs may hide advanced settings you would otherwise see in the macOS system print interface. SilverPC Blog
How to Fix “Manage Custom Sizes” Greyed Out on Mac
Here are the most effective methods to get custom sizes working again:
✔ Solution 1: Use the macOS System Print Dialog
Sometimes the application’s own print panel doesn’t show all options. Instead:
- Open the file you want to print.
- Go to File > Print.
- If you see a simplified dialog, click Show Details.
- Find the Paper Size dropdown and scroll to the bottom.
- Click Manage Custom Sizes once the full dialog opens. SilverPC Blog
This often unlocks the option you couldn’t access before.
✔ Solution 2: Update Printer Drivers and macOS
Outdated drivers can limit available print capabilities.
- Open Apple Menu > System Settings > Software Update.
- Install any macOS updates available.
- Visit your printer manufacturer’s website and install the latest macOS-compatible drivers.
Keeping both macOS and printer software up to date often fixes greyed-out features. allosguru.com
✔ Solution 3: Remove and Reinstall the Printer
Sometimes the connection profile itself is the problem.
- Go to System Settings > Printers & Scanners.
- Select the printer and click – to remove it.
- Click the + button and add your printer again (preferably using AirPrint if available).
- Try printing again and see if “Manage Custom Sizes” is active.
This refreshes the printer connection and can restore hidden options. community.hp.com
✔ Solution 4: Check User Permissions
Ensure your account has full rights:
- Navigate to System Settings > Users & Groups.
- Verify your account is an admin.
- If necessary, unlock the settings and grant proper access.
Limited accounts sometimes cannot modify advanced printing options. allosguru.com
Workarounds if the Option Still Won’t Activate
If none of the above fixes work, here are alternatives:
🔹 Print Using a PDF Export and Specify Size in PDF App
Export your document as a PDF and then open in a different app that respects custom sizes.
🔹 Try Third-Party Print Apps
Some apps like FinePrint or PrintFab offer more robust printing options than the built-in macOS print dialog.
🔹 Use a Different Application’s Print Dialog
Programs like Preview or Adobe Acrobat may expose the custom size option even when another app doesn’t.
Each of these can help you bypass the limitation and get the correct output you need. SilverPC Blog
FAQs
❓ Why is Manage Custom Sizes greyed out on Mac?
This usually happens due to printer compatibility, outdated drivers, app-specific print dialogs, or insufficient permissions on the Mac. allosguru.com
❓ How do I add a custom paper size on macOS?
Open the full system print dialog, go to Paper Size > Manage Custom Sizes, and click + to add your dimensions. Apple Support
❓ Will updating macOS fix printing issues?
Yes — updates often include printer driver improvements and can restore grayed-out features. allosguru.com
❓ What if a printer doesn’t support custom sizes?
In that case, check the manufacturer’s documentation or use a workaround like exporting to PDF and printing through another app. SilverPC Blog
Conclusion
Encountering a greyed-out Manage Custom Sizes option on your Mac can be annoying — especially when you need precise paper dimensions. But with the steps above, you can troubleshoot printer compatibility, update software, and unlock this useful feature.
From fixing permissions to refreshing printer drivers, most users can resolve the issue with just a few simple steps. If all else fails, alternative methods like exporting to PDF or switching printing apps can help you finish the job without the frustration.