
If you’ve ever looked at your PC’s security settings and felt completely lost, you’re not alone. Windows 11 comes with many features designed to keep your system safe, but some of them, like Secure Boot, can seem intimidating. Essentially, Secure Boot acts like a security guard for your computer’s startup process. It ensures that only trusted software and operating system files load when your PC powers on, helping protect against malware or unauthorized changes. Many people search for how to enable secure boot windows 11 because they want their systems to be more secure, especially if they frequently install apps or use external drives. In this guide, we’ll walk through everything step by step, using simple explanations and relatable examples, so you can feel confident adjusting your settings without fear of breaking anything.
How to Check if Secure Boot is Enabled Windows 11
Before making changes, it’s always smart to check whether Secure Boot is already active on your PC. Doing this is much like checking your iPhone’s settings before updating apps—you want to know the current status so you’re not making unnecessary adjustments.
On Windows 11, press Windows + R to open the Run dialog, type msinfo32, and press Enter. This opens the System Information window. Scroll down to find Secure Boot State. If it says “On,” Secure Boot is already active. If it says “Off” or “Unsupported,” you will need to enable it through BIOS or UEFI.
Knowing this first helps prevent mistakes and gives you a clear picture of your system’s security. For example, if you’re about to install a new driver or run a developer tool, you’ll want to confirm Secure Boot is working to ensure your PC won’t block trusted programs unnecessarily.
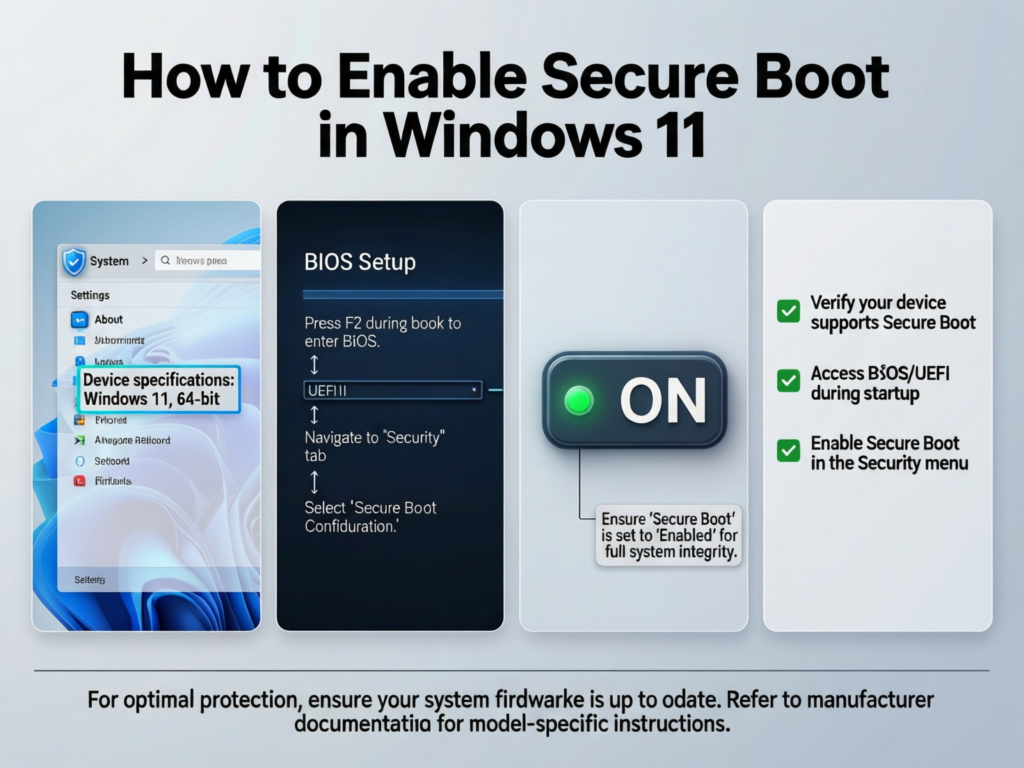
How to Enable Secure Boot in BIOS or UEFI
Secure Boot settings are controlled at a low level, through your PC’s BIOS or UEFI firmware. Think of BIOS as the control center that decides how your computer starts up, similar to how your phone controls app permissions behind the scenes.
To enable Secure Boot, restart your PC and press the key indicated on your screen—usually Delete, F2, or Esc. Once inside BIOS, look for the Boot or Security tab. Here, you’ll find Secure Boot. Change the setting to Enabled. Then, save your changes (typically by pressing F10) and restart.
Each click has a purpose: entering BIOS ensures you’re adjusting system-level settings; toggling Secure Boot tells your computer which software it can trust during startup; saving changes applies your new security rules. After doing this, Windows 11 will only load programs verified against trusted certificates.
For example, if you insert a USB drive with an unknown program, Secure Boot will block any untrusted executables from running at startup, keeping your system safe automatically.
How to Enable Secure Boot Windows 11 Z690 Aero G
If you’re using a specific motherboard like the Z690 Aero G, the interface is slightly different, but the steps are similar. Restart your PC and press Delete or F2 to enter BIOS. Navigate to the Boot tab and select Secure Boot Configuration. Make sure OS Type is set to Windows UEFI Mode. Toggle Secure Boot to Enabled and save your settings.
The Z690 Aero G interface has additional options to manage keys and OS types. For instance, leaving the OS type on “Other” may prevent Secure Boot from activating. Ensuring the correct mode avoids errors like “Unsupported” when checking how to check if secure boot is enabled windows 11.
Think of it like setting up your phone for Face ID—if the phone isn’t in the right mode, the feature won’t work. Once enabled, Windows 11 verifies every program at startup, giving you peace of mind.
Common Issues When Enabling Secure Boot and How to Fix Them
Sometimes enabling Secure Boot is not as straightforward as flipping a switch. One common issue is seeing “Unsupported” in the System Information window. This often happens if your system drive uses the older MBR partition style instead of GPT, or if your motherboard is set to legacy BIOS mode instead of UEFI.
Another common problem is forgetting to save changes in BIOS. If you exit without saving, Secure Boot will remain disabled. Updating your BIOS firmware can also resolve compatibility issues.
For example, a small business PC with multiple updates might still show “Off” for Secure Boot until the user switches the OS type to UEFI Mode. These steps may sound technical, but tackling them slowly—like installing a system update on your phone—makes the process manageable.
Benefits of Enabling Secure Boot in Windows 11
Enabling Secure Boot offers several practical benefits. It prevents malware from loading before Windows starts, protects system files from unauthorized changes, and ensures drivers are verified. This adds a layer of security similar to how antivirus apps scan downloads and email attachments in real time.
For example, if you frequently use USB drives for work or school, Secure Boot ensures that unverified programs cannot execute during startup. This is particularly useful for students or remote workers who share devices or receive files from multiple sources. The protection happens quietly in the background, so it doesn’t slow down your daily computing tasks, similar to how a phone firewall silently filters network traffic.
Step-by-Step Recap for Safe Enabling
- Check Current Status: Open System Information (
msinfo32) and confirm Secure Boot State. - Enter BIOS/UEFI: Restart your PC and press the boot key (Delete/F2/Esc).
- Locate Secure Boot Settings: Typically under Boot or Security tab.
- Toggle Secure Boot: Change it to Enabled. For specific motherboards like the Z690 Aero G, ensure OS Type is Windows UEFI Mode.
- Save and Exit: Press F10 to save changes and reboot.
- Verify: Recheck System Information to confirm Secure Boot is “On.”
Following these steps methodically prevents errors, ensures compatibility with Windows 11 features, and maintains system stability.
Troubleshooting Tips
If Secure Boot still isn’t working:
- Drive Issues: Make sure your system drive is GPT, not MBR.
- BIOS Version: Update your motherboard firmware to the latest version.
- Legacy Mode: Switch from Legacy BIOS to UEFI Mode.
- External Devices: Disconnect unnecessary USB drives during configuration.
These tips help resolve common roadblocks without confusing the user. Think of it like restarting your phone after installing a new app—sometimes the simplest fixes restore functionality immediately.
Feeling Confident with Secure Boot
Once you’ve enabled Secure Boot, your Windows 11 system is better protected without interfering with normal use. You now know how to enable secure boot windows 11, how to check the status, how to adjust motherboard-specific settings, and how to fix common problems.
Secure Boot works quietly in the background, verifying every startup program and driver while allowing trusted apps to run smoothly. By following these steps carefully, you gain both safety and control, similar to managing app permissions on a smartphone. Technology doesn’t have to be intimidating—small steps like these build confidence and make system security approachable for everyone.
How to Enable Secure Boot Windows 11 with BIOS Settings and Windows Defender Compatibility
SEO Keyword Section
how to enable secure boot windows 11, how to enable secure boot,how to enable secure boot windows 11 z690 aero g,how to check if secure boot is enabled windows 11,windows 11 secure boot settings,enable secure boot UEFI,
Frequently Asked Questions
Q: What does Secure Boot do in Windows 11?
Secure Boot ensures that only verified software loads during startup, protecting your system from malware that could run before Windows starts.
Q: Will Secure Boot slow down my PC?
No, it runs during startup checks only. Your daily performance remains unaffected.
Q: Can older PCs use Secure Boot?
Only UEFI-based systems support Secure Boot. Older BIOS systems may require conversion to UEFI and GPT.
Q: What if my Secure Boot option is grayed out?
This usually means your drive is not GPT, or the OS type is incorrectly set. Adjusting BIOS settings and updating firmware typically solves this.
Q: Is Secure Boot necessary with Windows Defender?
Yes, it enhances Defender’s ability to verify drivers and core system files, improving overall protection.
Conclusion :
Enabling Secure Boot in Windows 11 doesn’t have to feel complicated. By following the steps we’ve covered—checking your current status, navigating BIOS or UEFI, and adjusting settings safely—you now know how to enable secure boot windows 11 and can feel confident doing it on your own. This feature quietly protects your PC at startup, allowing only trusted programs to run, without affecting your everyday work or gaming. Over time, using Secure Boot becomes second nature, like managing app permissions on a smartphone. With this knowledge, you can keep your system secure, troubleshoot minor issues, and approach other security settings with calm confidence.